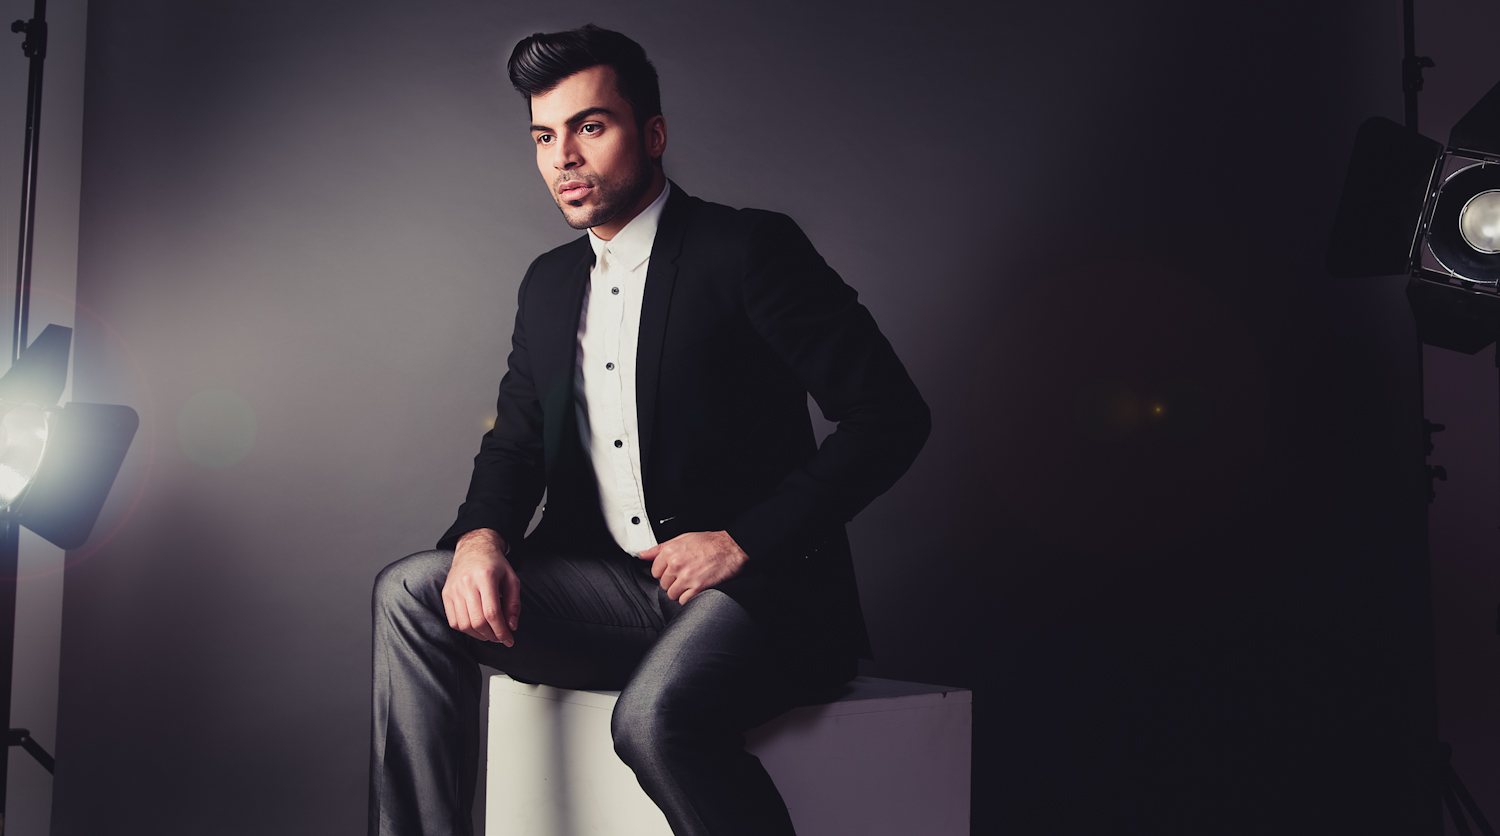
I mostly shoot women for beauty and fashion editorials, so was delighted to work on a menswear editorial with Yash @ MOT Models, make up artist Halimah from H-Beauty, and Styling by CreateMe Stylists. Enjoy!


I mostly shoot women for beauty and fashion editorials, so was delighted to work on a menswear editorial with Yash @ MOT Models, make up artist Halimah from H-Beauty, and Styling by CreateMe Stylists. Enjoy!
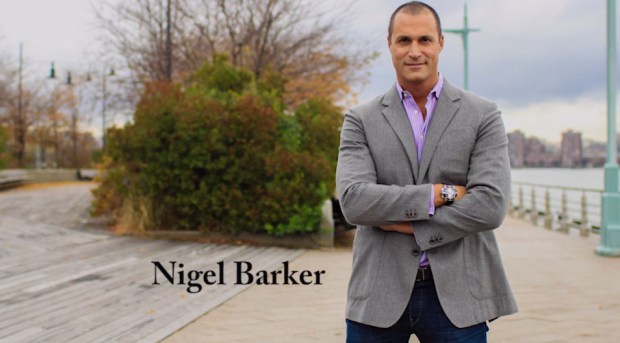
I’m with Nigel Barker on this one – retouching how we look has been around for millennia: be it clothes, hairstyles, make-up, working out etc. As humans we manipulate how we look all the time.
I’m a professional photographer, so I retouch. Shock horror, but I do – however as Nigel says in his #BehindTheGlass video, I’m not flippant about the impact, nor the responsibility that comes with retouching.
I categorise my retouch in my own mind:
The first 3 types of retouch I will apply to all types of photography in varying degrees, despite trying to get the closest results in camera as possible particularly with good lighting and composition. Colour manipulation is particularly good for creating certain moods, be it sunny and happy, or classic and elegant, colour manipulation is a powerful tool.
The last type of retouch, the artistic physical manipulations such as skin retouch, removal of stray hairs, slight physical features manipulation I only apply to fashion/beauty imagery. It’s a personal choice of mine to not ‘artistically’ manipulate wedding or family images, those of me or my daughter, because I feel personal photography like weddings, family, and portraiture should be accurate likenesses of people. I do retouch such images using light and colour management, but I don’t physically or structurally alter their looks. For fashion/beauty images though, I do artistically retouch.
I do see fashion and beauty imagery as different to lifestyle imagery – it’s about aspiration, it’s about inspiration, and an ideal. Clients, advertising, and entertainment aren’t about reality, and it’s not about passing off those images as real, but being open about the artistry that goes into creating such imagery. It’s a fine balance though, since I know portraiture in magazines, and even lifestyle and wedding images are manipulated now too.
Whatever your stance on retouching, just remember we all do it, all the time. As Nigel said, the simple of act of brushing your hair is retouching yourself…
Twitter: twitter.com/nigelbarker
Facebook: facebook.com/NigelBarkerOfficial
Instagram: instagram.com/nigelbarker

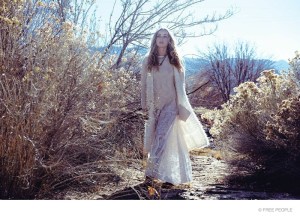
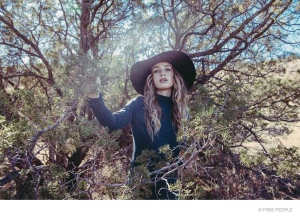
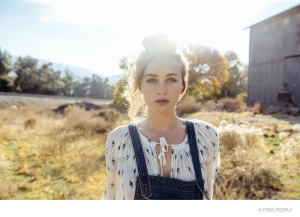
I look the new Free People Look book featuring Zella Day – romantic, wispy, hazy, but oh so up to date! Come the better weather, I’ll be planning shoots like this one! Who wants to play?!
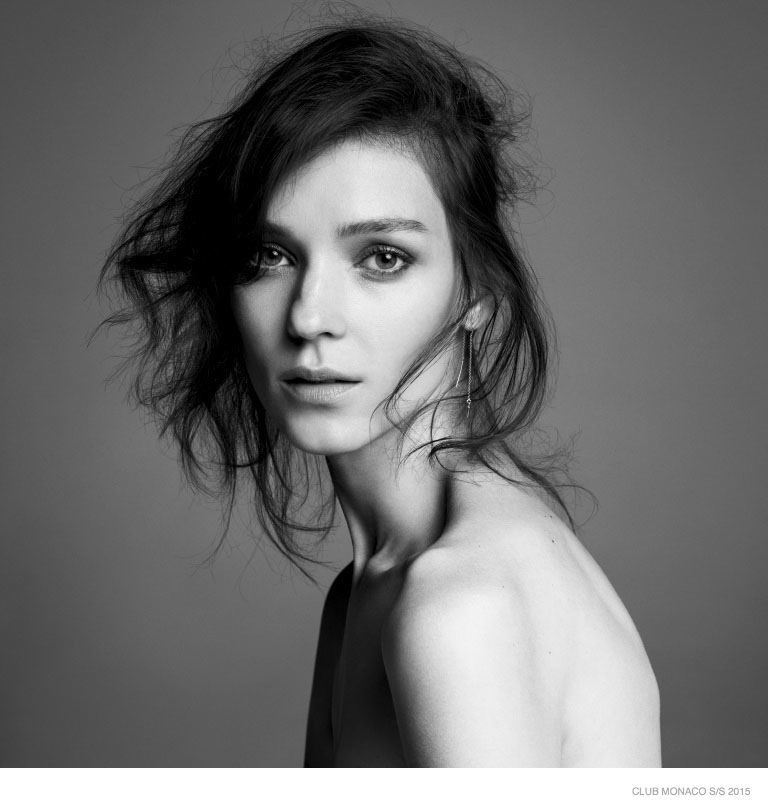
Loving this grey scale look book for Club Monaco SS15. I’m known for my colour popping images, so this year I’m going to develop my B&W portfolio too! This 70s themed shoot for Club Monaco was by photography duo Inez van Lamsweerde and Vinoodh Matadin.


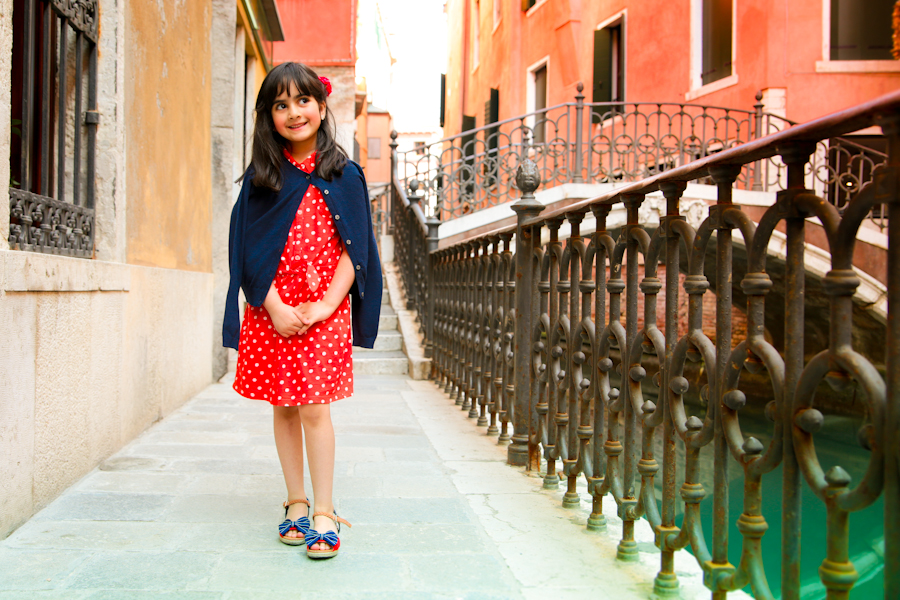
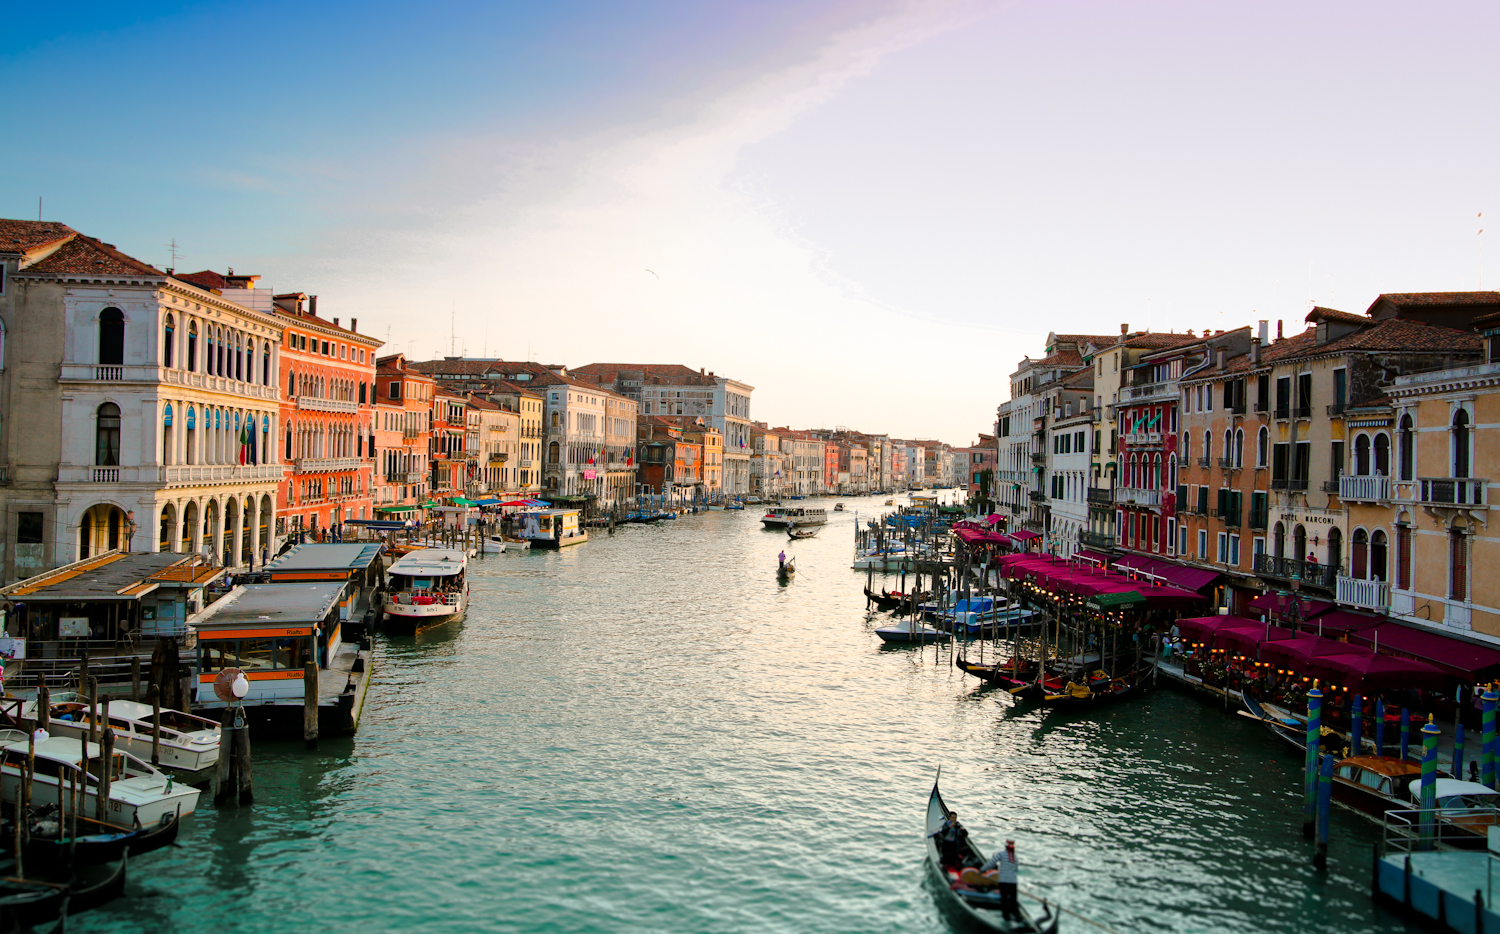
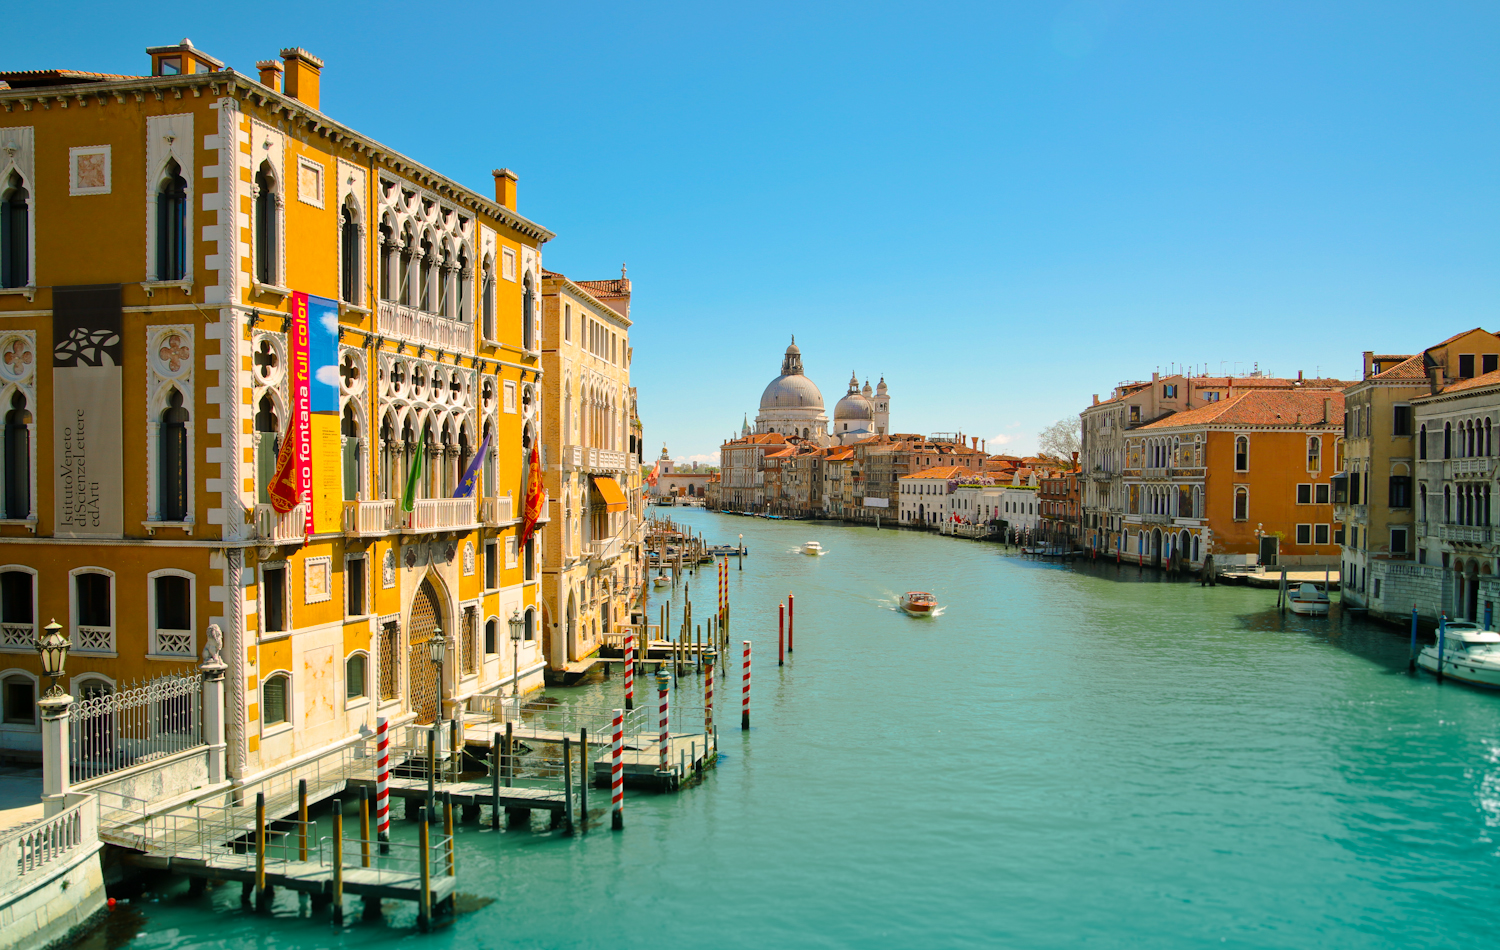
I adored my trip to Venice last year with my little daughter, and wanted to share some more Atomik GPS tips with you all 🙂 There are GPS coordinates for Google Maps under each image, so next time you’re planning your trip, you can take some gorgeous images too!

Traghetto Dogana Ca Vallaresso – Venice


Burano Island – Colourful Houses – Fondamenta San Mauro
I recently had the opportunity to shoot the stunning collection by Yuvna Kim – Maison De Couture. The most delicate of laces in the richest reds, and encrusted in jewels, embroidery, and chiffon embellishments, it’s no wonder her designs are an international hit with celebrities on the red carpet.


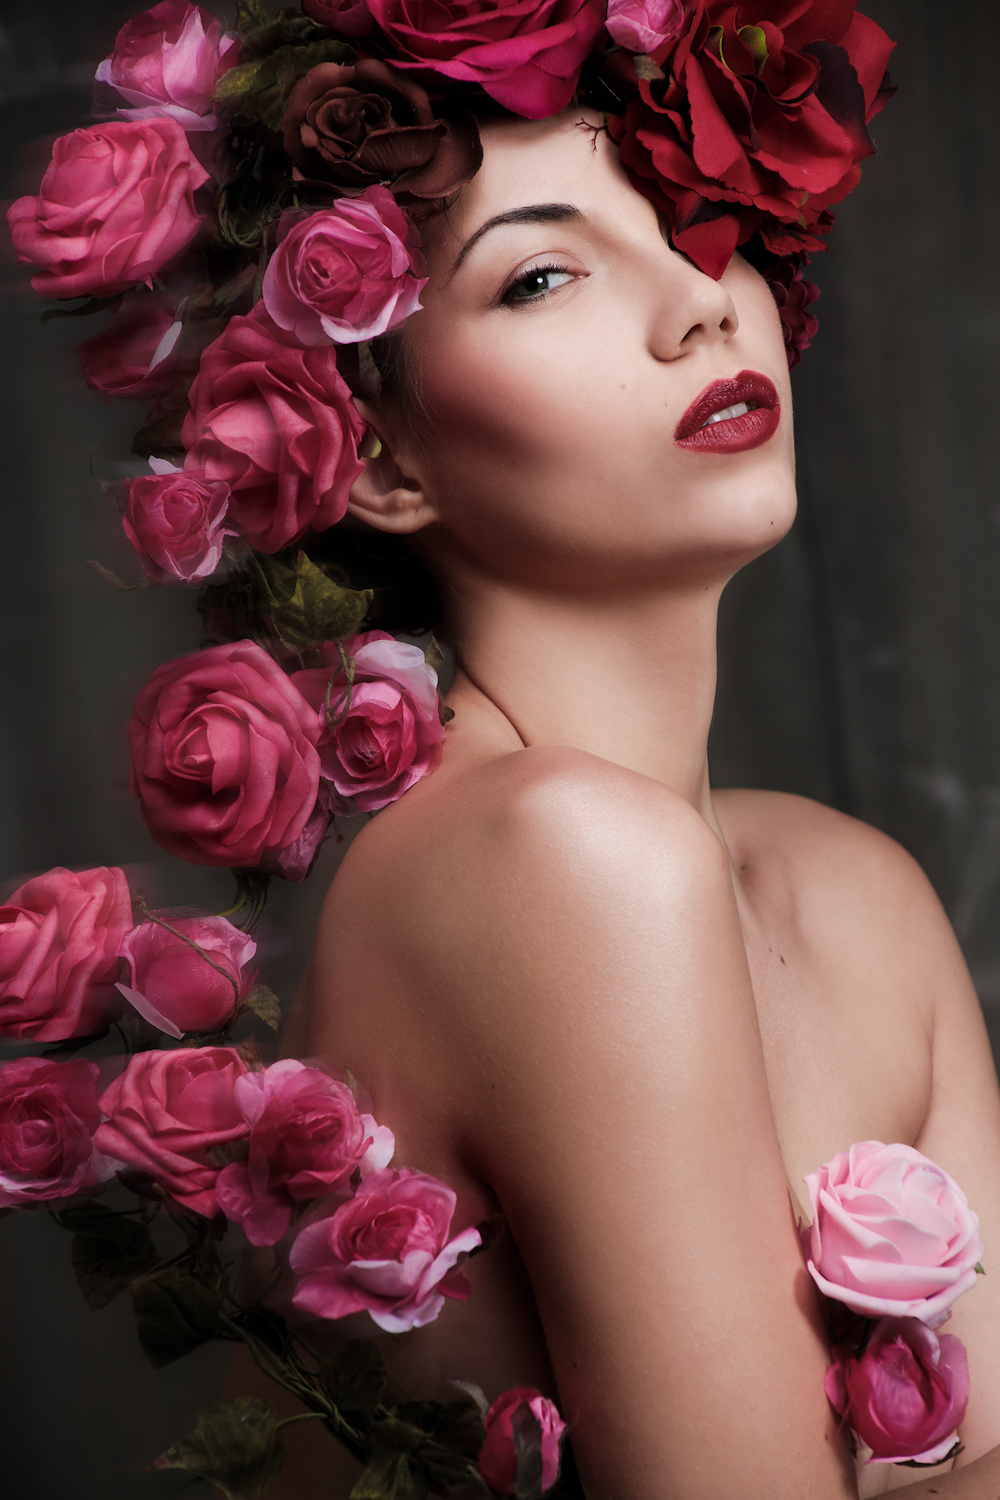
I’ve been wanting to shoot with flowers again for a long time, and am very glad I got the opportunity to work with a great creative team: MUA: Suki Miles, Models: Natalia and Delina, Studio: Adrian Pini Studio.


Many photographers don’t share their photo-shoot locations, but I’m really happy to – and after a few trips last year, many people have asked me the best places to shoot on location. So in my Atomic GPS series, I’m going to share my shoot locations, image by image for you all.

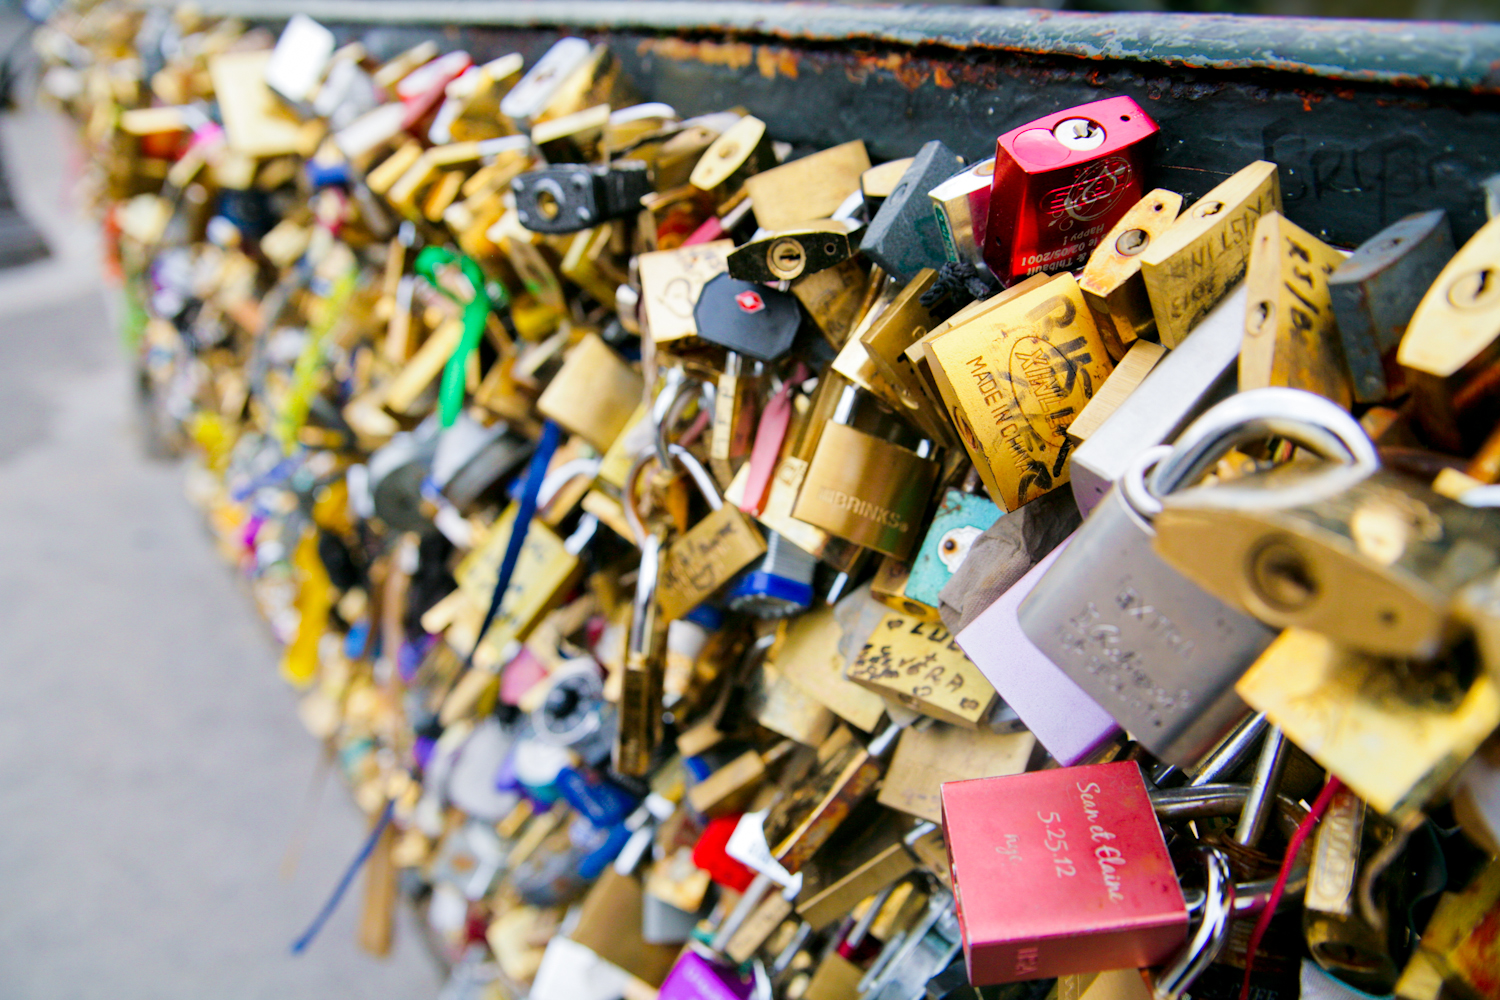
Pont de l’Archevêché – The Lock Bridge


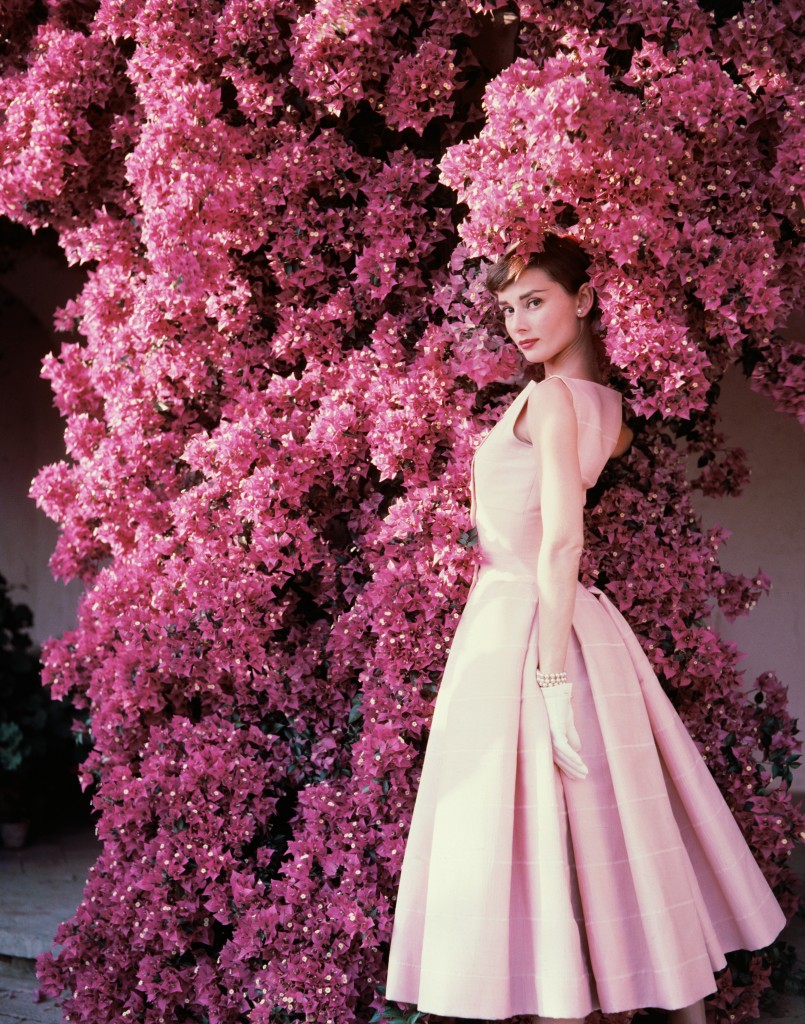
From Roman Holiday to Funny Face, Sabrina to Breakfast at Tiffany’s – since I was a child, the uninhibited laughter, and the glow of her being captivated me. Audrey Hepburn beat every other iconic star for me.
It would have been her 85th Birthday, and to celebrate her memory, here are some of my favourite images of her – lucky photographers who got to work with such a creature:


There’s an easy way to create va va voom in your images through boosting colour – but I’m not talking about flat upping the saturating here… This tutorial shows you how to boost individual colour groups without tinting the entire image in Adobe Lightroom.
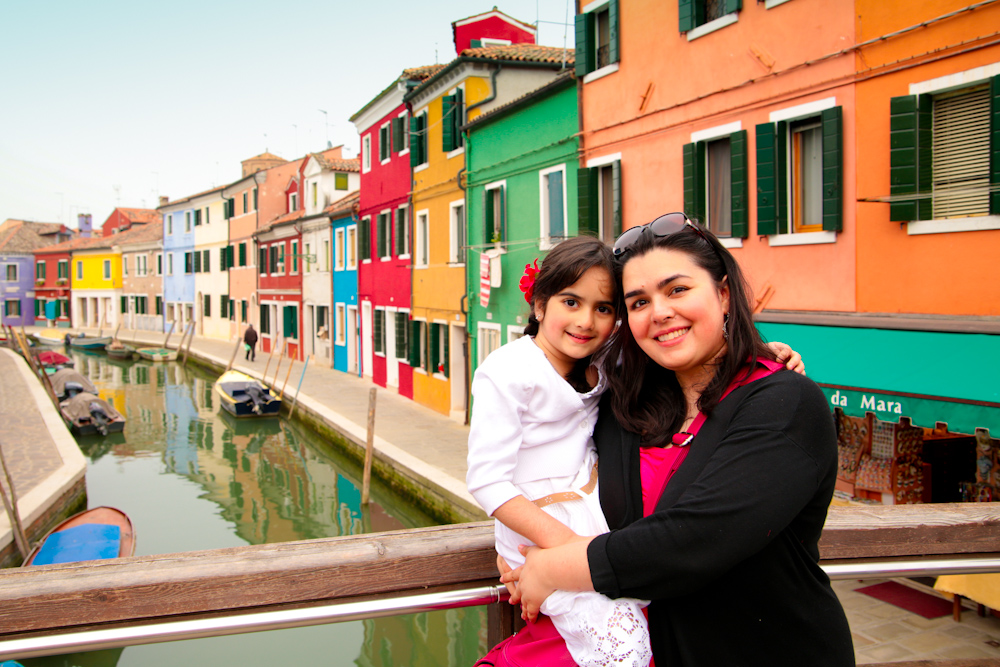
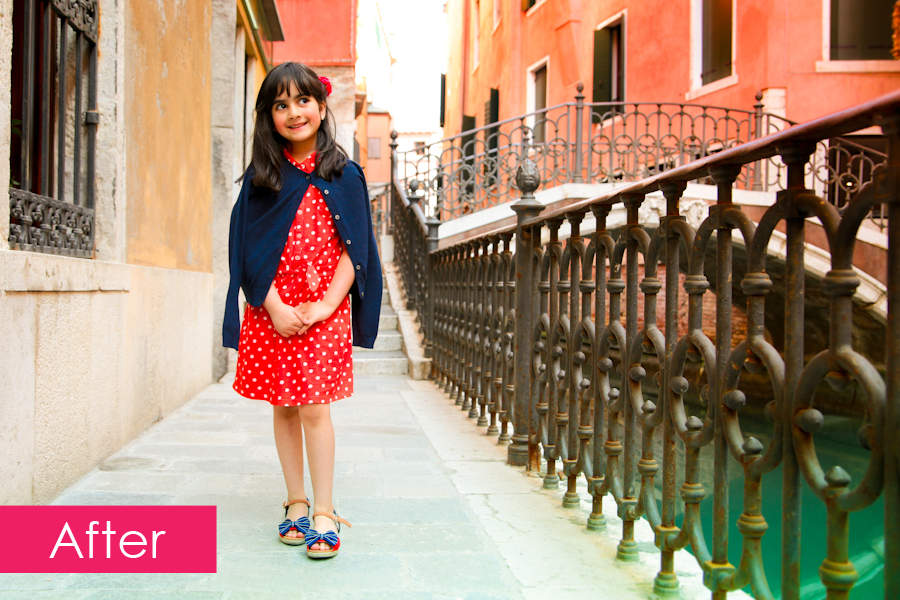
Here is my original image from a recent holiday to Venice with my daughter:

It’s a decent image, but I know from memory, her dress was redder, the water was even more turquoise, and the buildings were a more fiery orange and red. Now I want to up the colours, but I don’t want to unbalance my daughter’s skin tones, or cause image degradation through a broad brush saturation increase.
The place to boost individual colour groups, is in the Develop > HSL (Hue Saturation Luminance) > Saturation control panel.
Develop:

HSL:

Saturation:
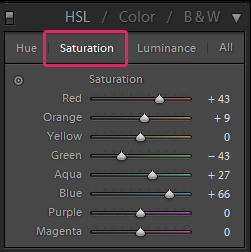
As you can see above, we can now boost the saturation of individual colours in the image, and I’ve upped my reds, blues, aqua, orange, and brought down the green a little. Have a play around with the sliders to achieve the level of boldness you desire.
The Hue mode allows you to alter the hue/shade of the colours, and the Luminance mode allows you to control the lightness or darkness of certain colours.
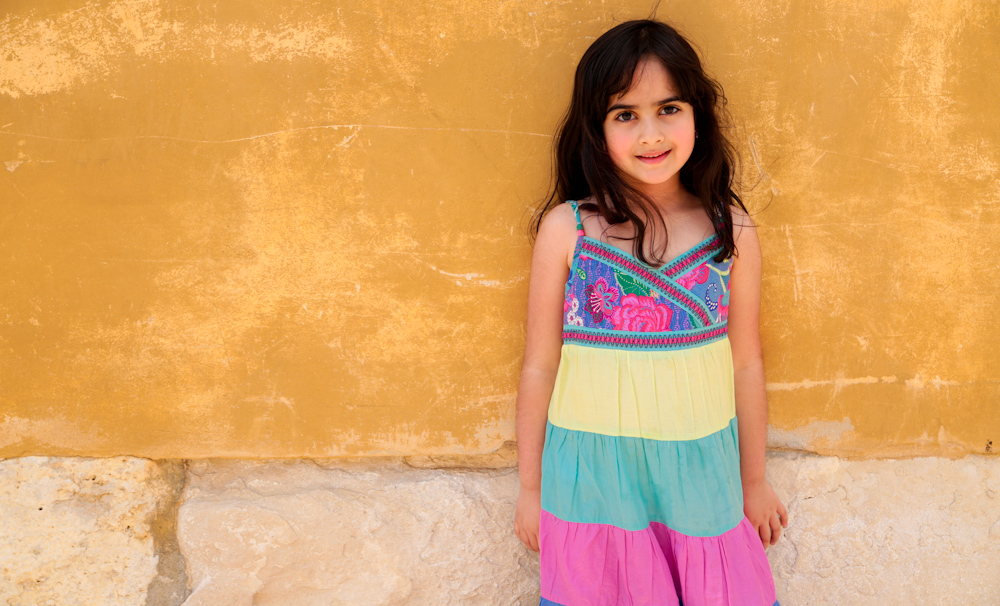
Finally, I did also do a +9 on overall saturation too to give the following result:
Have fun colour boosting!
