lighting set up

Saturday Set Up – Shimmer Me Up

SetUp Polish

I’m a sucker for glowy skin, and this set up is how I get it – working in conjunction with my make up artist (see below).

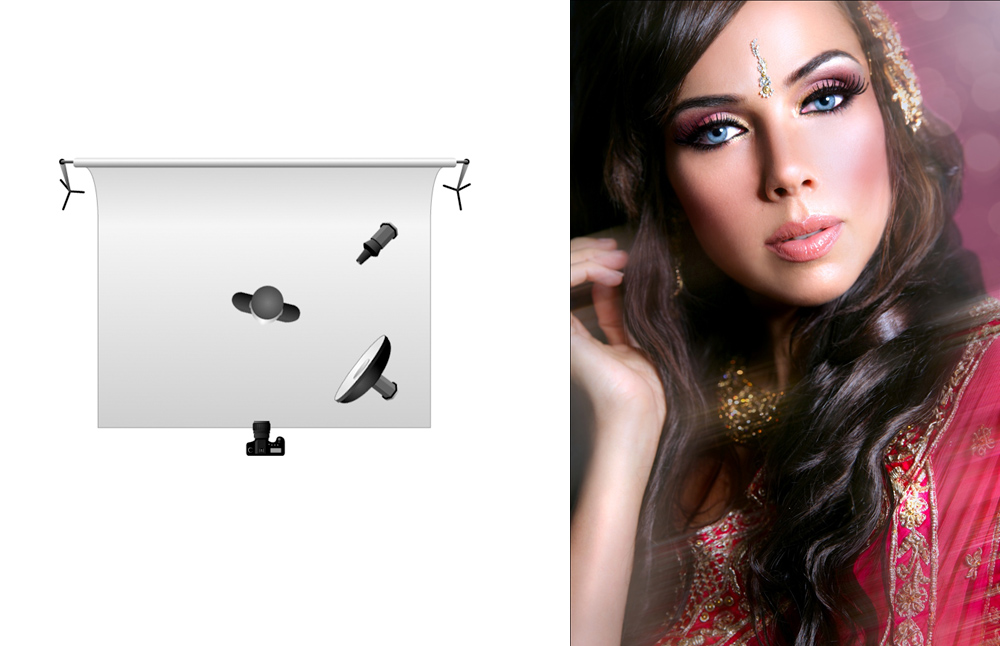
1. Large Softbox on background – to blow out the background, set this light head to a higher output than your key light.

2. Small Softbox as key light – To get shiny highlights on the cheek bone, jaw, shoulder and nose, place the key light close to the model, at a lower output to the background light to keep that background pure white!  At this point, I usually take a test shot, and ask the make up artist in the team to add more shimmer or highlight to the parts of the model I really want to shine.  It’s super important to collaborate closely with the make up artist even while shooting.

4. Camera settings – Shutter speed 1/160, aperture f5.6, ISO 100.

Saturday Set Up – Bright and Balanced

SetUp Kellie

A common lighting set up for beauty photography – bright and balanced.

1. Large softbox as key light – Placed to one side of our model Kelly, you can see how the large softbox is throwing a soft even light on the left side of the image.

2. Smaller softbox as fill light – Placed at a slightly closer distance on the opposite side of the key light, the smaller soft box balances the light from the larger softbox giving a bright image that really shows off the make up and colours in the image.

3. Camera settings – Shutter speed 1/125, aperture f5.6, ISO 100.

Happy lighting!

Saturday Set Up – Moody

SetUp Gwen

One of the easiest lighting set ups with the most dramatic and moody effects.

1. Large softbox as key light – Placed very close to the side of our model, you can see how the large softbox is throwing a soft even light on one side of her face shoulders and arm, and creates hard deep shadows on the other side.  Deep dark shadows create drama and contrast, and help create an alluring effect.  Note: the closer the light to the model, the sharper the shadows.

2. Camera settings – Shutter speed 1/160, aperture f5.6, ISO 100.

Happy lighting!

Saturday Set Up – Sharp Definition

SetUp Lara

This lighting set up achieves sharp light and shade contrasts with a dark background, helping the subject really ‘pop’.

1. Beauty Dish as key light – (Yes I love beauty dishes)!  Placed almost completely to the side of Lara our model, you can see how it’s creating a lovely light on one side of her face, and throwing deliciously deep shadows on the opposite side of her nose and face.  I love these sharp contours that accentuate Lara’s face, and help bring out the depth of shimmer in the make up and jewellery.

2. Small snoot as hair light – since we had jewels in Lara’s hair, a small snoot sitting behind her at a lower output than the key light helped provide a glint in the hair accessories.  Without this light, the accessories looked a little flat.

3. Camera settings – Shutter speed 1/125, aperture f5.6, ISO 100.

Happy lighting!